Payment Gateway
OnRes is partnered with PCI Booking and offers more than 70+ Payment Gateways.

Among those 70+ gateways, the one with the most features, and is the easiest to setup is Authorize.net.
A Payment Gateway with Authorize.net will likely connect with your Merchant Account
(your current credit card processor).
You will need to have a Merchant Account.
If you do not, Authorize.net offers a Merchant Account in addition to their Payment Gateway.
To get started, click the following badge:

For additional Payment Gateway options: Click
Here.
1. Setup Payment Gateway
1.1 How to setup a Payment Gateway?
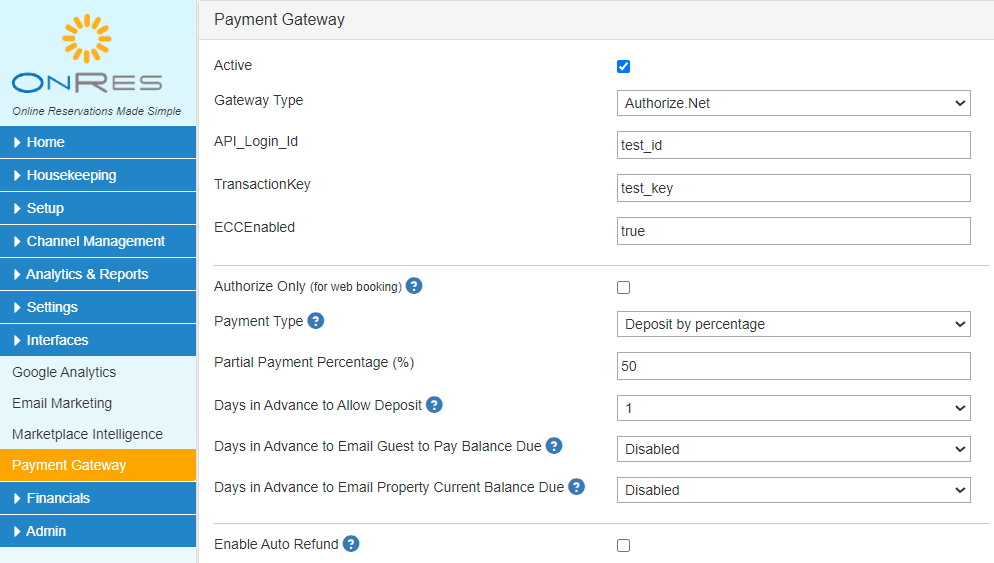
Assuming you already signed up with a Payment Gateway account, e.g. Authorize.net, select it from the
Gateway Type dropdown, then all we need is two pieces of information to place into your OnRes account
– API Login ID and Transaction Key.
Once the API credentials are in place, you can set up other related payment options as needed
at Interfaces >> Payment Gateway section.
For example, you can choose your Payment Type, which is set to control
how guest credit cards are charged at the time of booking. For charging the cards manually at
the 2.0 system, this setting is not needed, as you can charge any amount from the card
as needed.
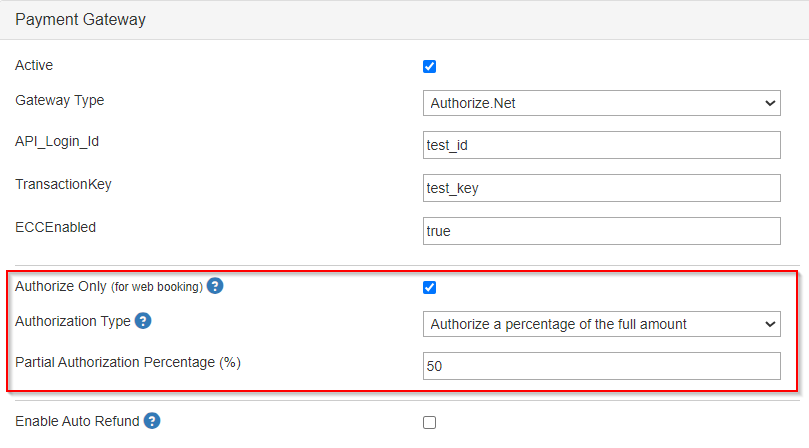
1.2 How to enable the Pre Authorization Only option?
If you do not wish to charge the guest credit card, but would like the system to pre-authorize the
guest card at the time of booking, you can enable the "Authorize Only (for web booking)" option.
When it's enabled, the system will pre-authorize the configured amount to the guest card. No actual
charge will be made. If the authorization is successful, the system will proceed with the reservation,
otherwise, the reservation will not be made.
As shown in the screenshot below, you can set the amount to be authorized by selecting the Authorization
Type. For example, if you only wish to check if the credit card number is valid at the time of booking,
you can select the "Authorize a percentage of the full amount" option, and enter "0" for the
"Partial Authorization Percentage(%)" field.
2. Charge / Refund Credit Card
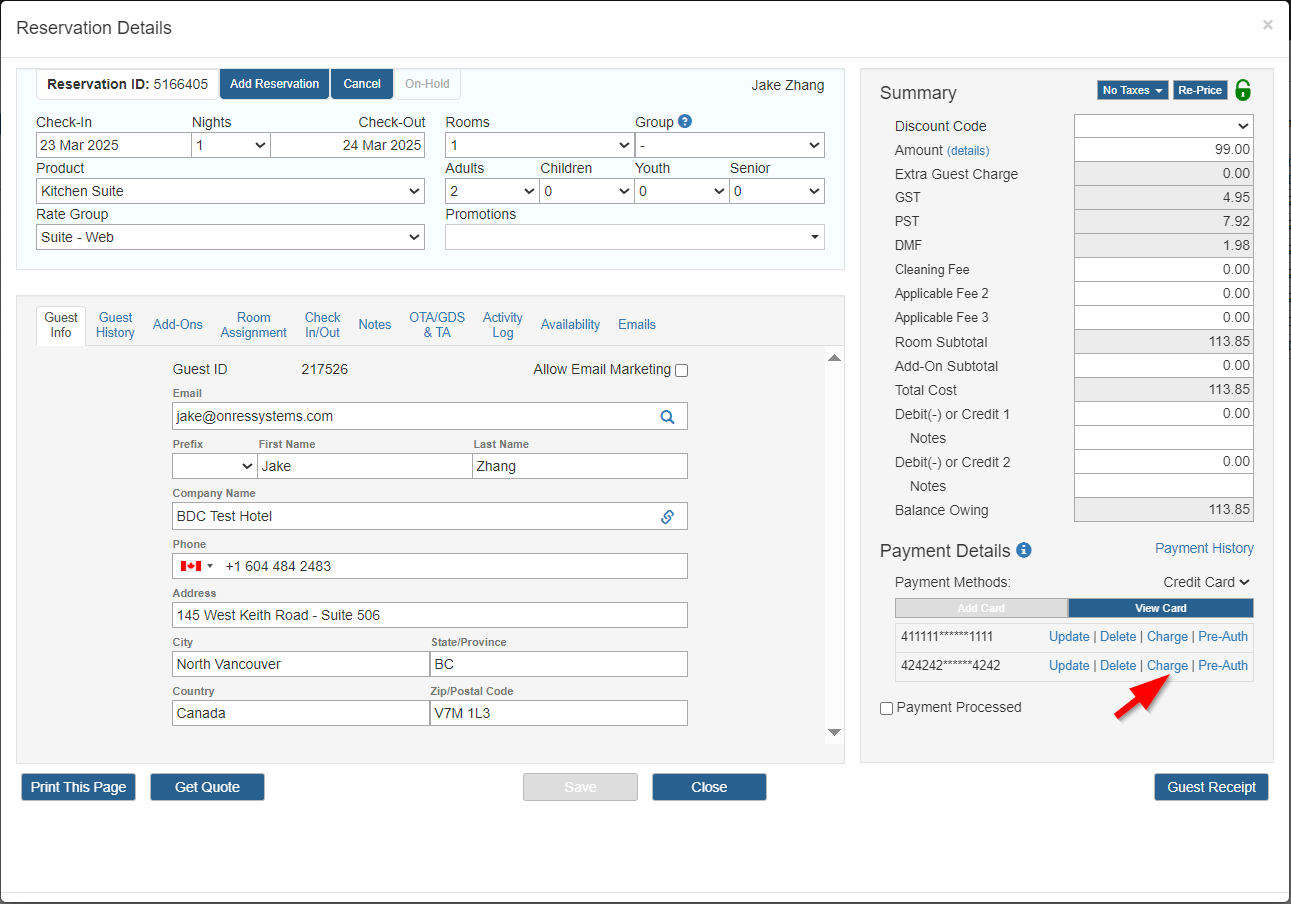
2.1 How to charge credit card?
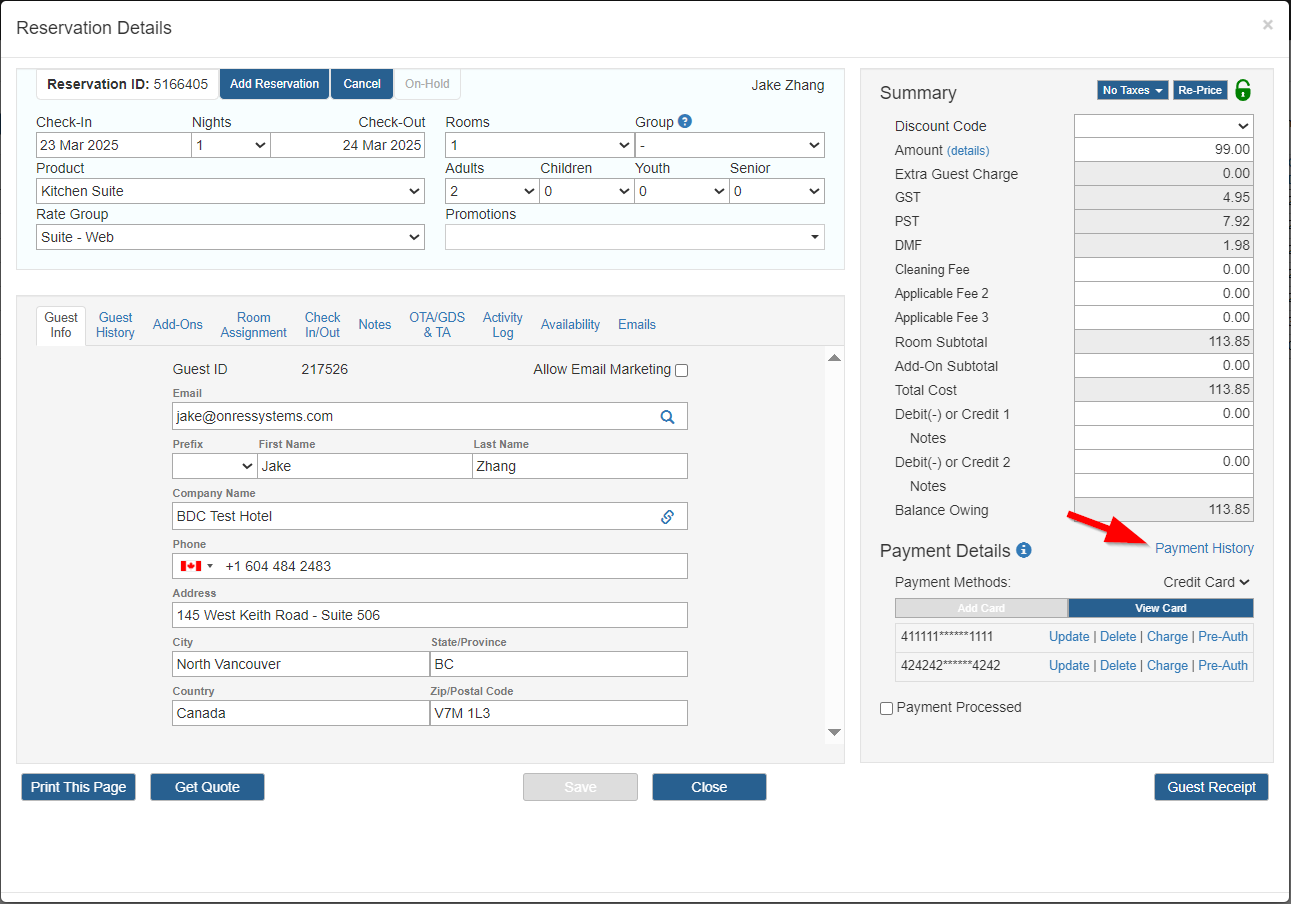
Open the Reservation Details window, and click on the Charge button. Make sure you have the guest
credit card information and total amount saved in the reservation record before doing this.
Then on the popup, you can choose a different amount to charge (e.g. a 50% deposit), then
click Pay button to proceed
The system will then connect to the Payment Gateway interface and respond with a success or fail
message after the transaction.
2.2 How to refund to a credit card?
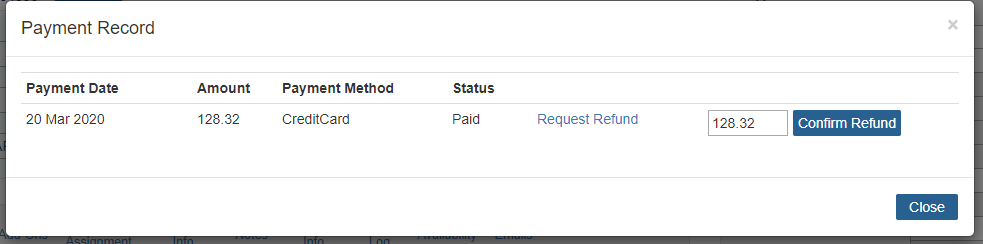
Click on the Payment History link to open up the Payment Record popup.
Click on the Request Refund link, then enter the amount that you would like
to refund, then click on Confirm Refund button to proceed.
After the transaction, a new record showing that the refund success (or failure) will show up
in the Payment Record table.
Note that you can only refund the transactions that you made through the OnRes/Gateway interface,
E.g. those transactions that have a recod showing in the Payment Record section with a
"Request Refund" button.
Usually transactions can't be refunded until the payment was settled. Depending on the
policies set by the Payment Gateway, it could be from a few hours to a day or even longer.
2.3 How to pre-authorize credit card?
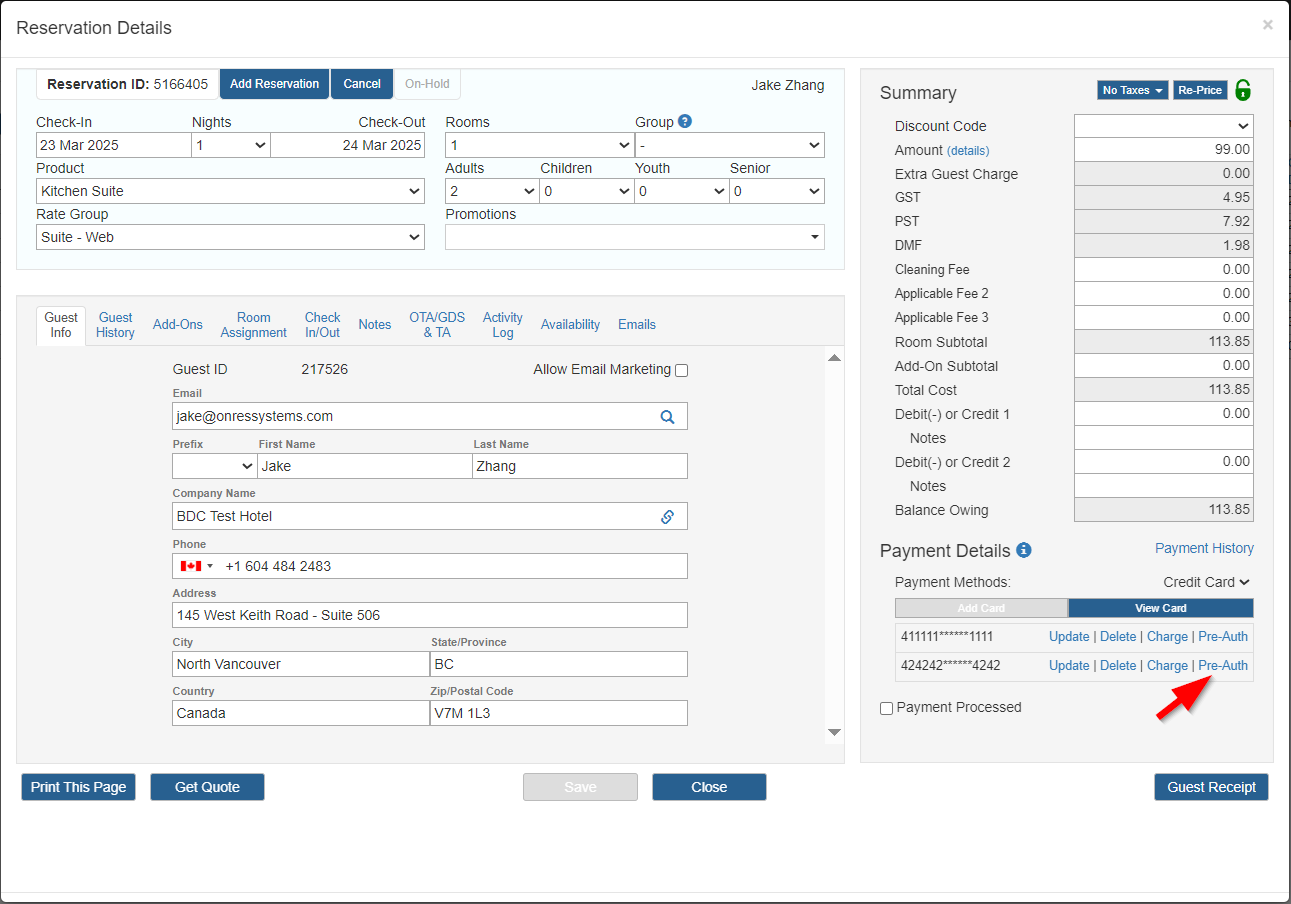
Open the Reservation Details window, and click on the Pre-Auth button. Make sure you have the guest
credit card information and total amount saved in the reservation record before doing this.
Then on the popup, you can choose a different amount to authorize (e.g. a 50% deposit), then
click Authorize button to proceed
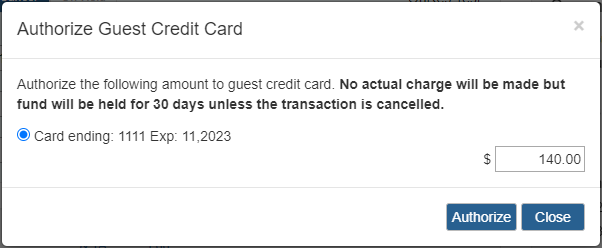
The system will then connect to the Payment Gateway interface and respond with a success or fail
message after the transaction. If it's successful, you will see a transaction record in the Payment History
section with Payment Status "PreAuthorized".
Note:
- The pre-authorized amount will be held for 30 days unless the transaction is cancelled
- When you charge the guest credit card that had a prior pre-authorization, avoid making a new
charge by clicking on the Charge button, instead,
open the Payment History popup and complete the charge on the pre-auth'd transaction (see Section 2.4 below).
- If you want to cancel the pre-authorized transaction, see Section 2.5 below for details.
2.4 How to charge the pre-authorize amount?
Click on the Payment History link to open up the Payment Record popup.
On the pop up, loacate the transaction record with status PreAuthorized, click the "Charge" button
and press Confirm Charge.
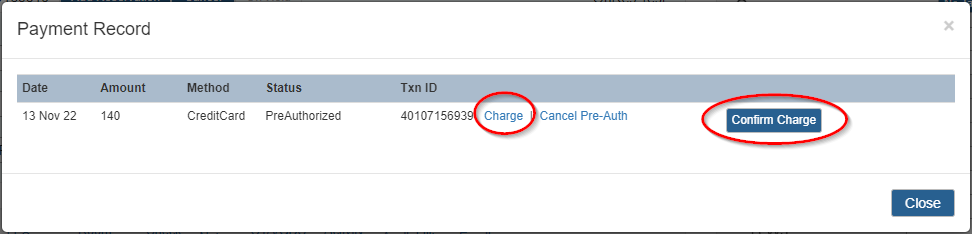
Up success, the system will mark this transaction with "Paid" status
2.5 How to cancel the pre-authorize amount?
Click on the Payment History link to open up the Payment Record popup.
On the pop up, loacate the transaction record with status PreAuthorized, click the "Cancel Pre-Auth" button
and press Confirm Cancel.
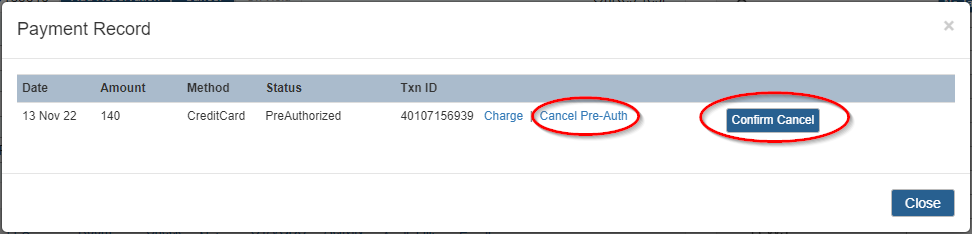
Up success, the system will mark this transaction with "PreAuthorized (voided)" status
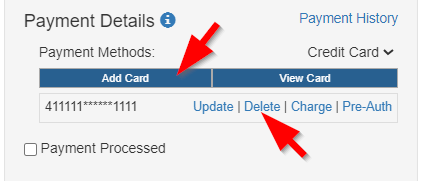
2.6 How to add the 2nd payment card?
You are allowed to add the 2nd payment card into the reservation.
Click on the Add Card button to add the card, and the Delete button to delete it.