Managing Reservations
Reservations can be managed by Reservation Manager,
Reservations List, and Reservations Details.
1. Reservation Manager (Classic View)
You can view, create, modify or cancel reservations on a date grid at the Reservation Manager. The numbers
shown on the date grid indicate the number of rooms available for a perticular room type.
1.1 How to view reservations on a date?
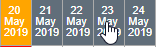
Click on a date on the grid, the following reservations will be listed on the right side of the grid:
- Reservations checking-in on selected date
- Reservations checking-out on selected date
- Reservations staying over on selected date
1.2 How to view reservations on a date on a particular product (room type)?
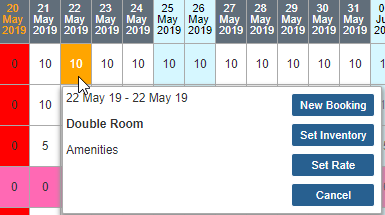
Click on a parcular block on the grid, the reservations that are made on the corresponding product (room type)
on that day will be listed on the right side of the grid
1.3 How to manage the reservations listed on the right side of the screen?
Sorting - click on the column head to sort the reservation list by the selected column.
Filtering - click on the Filter icon
to expand the Filtering sections, where you can enter certain Reservation ID, Guest Name, or select
a particular product to filter the reservation list by ID, guest name, or product (room type).
Tasks - click on the icon to display
options for various tasks for each of the reservation.
Viewing Details - click on the button with Reservation ID to open the Reservation Details window
More details with Reservation Details can be found in the section below.
1.4 How to create a new reservation?
Two ways to create a new reservation:
- Click on the New Booking button to open the Reservation Details
window for creating a new reservation
- Click on (or Drag & Select) a date (or date range) on the date grid on a product (room type),
and select the New Booking button on the pop-up widget to open the
Reservation Details window which has the desired date(s) and selected product (room type) populated
in the form.
1.5 How to modify a reservation?
Two ways to modify a reservation:
- If you just want to modify the reservation dates or room type, you can drag the Reservation ID
button, e.g. 800001 and drop it into the date grid where the
desired start date and room type is.
- You can also click on the Reservation ID button, e.g. 800001 to
open the Reservation Details window to change any details of the reservation.
1.6 What else can you do on a date grid?
You can perform other operations for a certain date (or date range) by clicking on various buttons on
the pop-up widget, e.g. Set Inventory button to set the inventory for the
selected date(s), and Set Rates button to set the Rates for the
selected date(s).
2. Reservation Manager (Enhanced View)
2.1 What's new?
The Enhanced Reservation Manager has the following improvements / updates:
2.2 How to switch between the Enhanced View and Classic View?
When you login the first time after the new Reservations Manager is deployed, you will be prompted to choose to either try the enhanced Reservations Manager
now or stay with the current Classic view. Once you've made your choice, it will be set as your default Reservations Manager.
To change your default Reservations Manager, click the following botton on the top right corner of the screen, e.g.
- Classic View
- Enhanced View
2.3 How to use the Filter function?
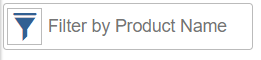
You can click on the filter box as shown above, type in the product name (full or partial), the product rows in the table will be filtered
by the full (or partial) name you have typed in. For example, you can type in "double" to show all products that have "double" in its name. Note that this
filter only applies to the parent products (the inventory room types).
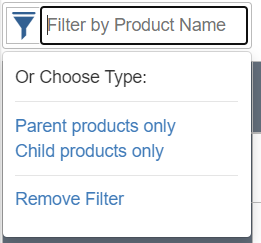
Alternatively, you can also click on the dropdown options to display only the parent or child products. The default view is only showing the parent
products, hence clicking on the "Parent Products only" is essentially the same as "Remove Filter"
To remove the filter, click on the "Remove Filter" option in the dropdown
2.4 How to use the Smart Search function?

You can use the Search box as shown above to find reservations in the system by the following information.
- ID - can be the standard OnRes Reservation ID, e.g. 9123456, the Master Reservation ID, e.g. M12345, or the OTA/GDS Confirmation #
- Guest Name - can be just the last name, first name, or full name, e.g. "Smith", "Mike, "Mike Smith", or "Smith, Mike"
- Guest Email
- Guest Phone Number
The system will try to search the reservations within the date range that your calendar is currently showing. If no desired search results found,
you can click on the "Search other dates", and the system will search all reservations from the past 30 days to 18 month out in the future.
You can click on the Reservation ID link on the search results table to open the Reservation Details window.

2.5 How to show/hide the reservations on the right side panel?
By default, the right side reservation panel is hidden. There are two ways to bring them out:
- Click on a date on the table header. This brings out the reservation panel which displays the reservations on the selected date.
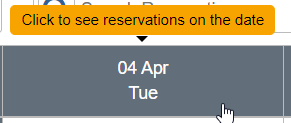
- Click on the left arrow to bring it out. On mobile, you also swip left to bring it out.
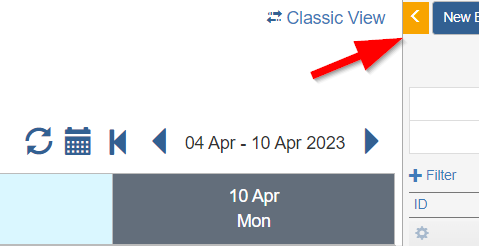
To hide it, click on the right arrow, or swipe right if it's on mobile
3. Reservations List
Clist on the "Reservations" tab on the left navigation menu to open the Reservation List page, which allows
you to view and search any future or past reservation(s)
3.1 How to view / find reservations in the list?
By default, the list is populated with the reservations booked during the past 30 days.
You can change the Date Range and the Date Range For dropdown list to populate the list at
your prefrence.
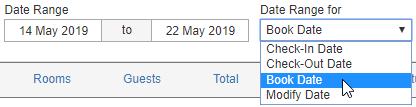
Or use the Quick Access buttons to show reservations for Today, Tomorrow, or any Month. Note this list
is still controled by "Date Range For" dropdown, which would show the different lists depending on
your choice. For example, if you choose Tomorrow at the Quick Access,
and Date Range For is set to "Check-out Date", then the list would show all reservations checking-out
tomorrow.
Sorting - click on the column head to sort the reservation list by the selected column.
Searching - you can enter certain Reservation ID, Guest Name, or select
a particular product to find the reservation by ID, guest name, or product (room type).
Viewing Details - click on the Reservation ID in the list to open the Reservation Details window.
More details with Reservation Details can be found in the section below.
Exporting - click the Export button to download the reservation list
showing on the current screen in a CSV format file.
4. Reservation Details
You can create new reservations, view or modify existing reservation on the Reservaion Details window
4.1 What are the tabs on the Reservation Details for?
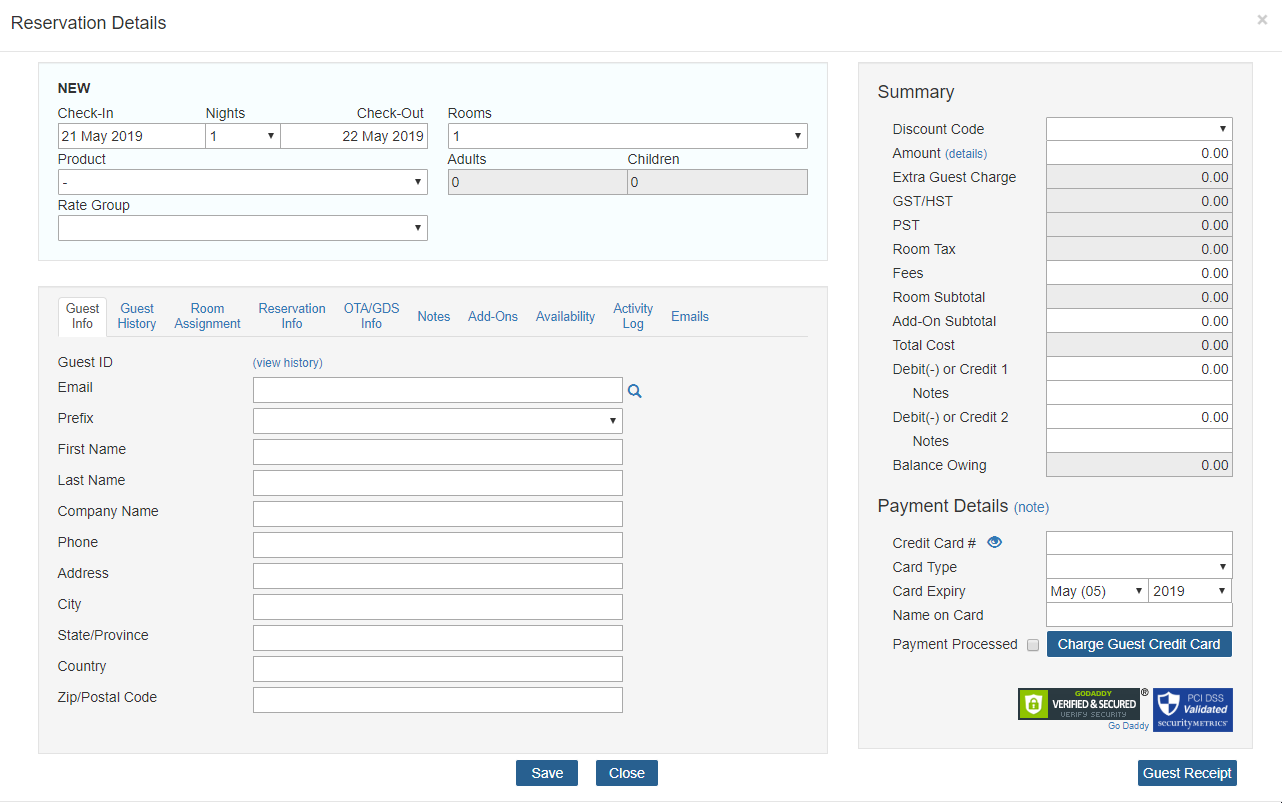
Guest Info - Guest contact information. You can look up an existing guest info by entering
the email and click on the icon. The guest information
will be populated into the fields below if it is in the record. You can also click on "View history"
to view the guest booking history.
Guest History - shows a list of reservations booked by the guest, and his or her current
Reward Points and Status (if it is recorded in the Contact Manager).
Room Assignment - allows user to assign rooms to each guest
Reservation Info - Miscelleneous reservation related information. E.g. Check-in/out status,
Room Clean status, etc.
OTA/GDS Info - OTA (Booking.com / Expedia) or GDS related information, e.g. their confirmation
number. Not applicable to reservations directly booked through OnRes.
Notes - allow user to enter any reservation related notes.
Add-ons - allow user to view, add, or delete add-on items.
Availability - allow user to run availability search for the dates entered in this window during
the process of making a reservation. When the search results are ready, click on the
Select button to populate the room type and rate group to the respective
fields in the Details window.
Activity Log - shows a history of changes made to this reservation.
Emails - allow user to send various type of guest emails, e.g. Confirmation, Check-in Reminder,
or Custom Emails, etc.
4.2 How to view daily rate break down for a multi-day reservation?
Sometimes user would like to know the what is the rate for the each day of the reservation. You can click
on the (details) link next to the Amount box in the Summary section to show the break down of the daily
rate.
4.3 How to manage the guest credit card number?
Guest credit card numbers are managed in the Payment Details section, where you can Add, Delete, Update, View
the card info, or charge the card if the Payment Gateway is enabled in your account.
The system supports storage of up to two credit cards. The card number captured during online booking is generally
captured in the first slot and you can add a second card manually here. When clicking on the View Card button, both
card details will be displayed.
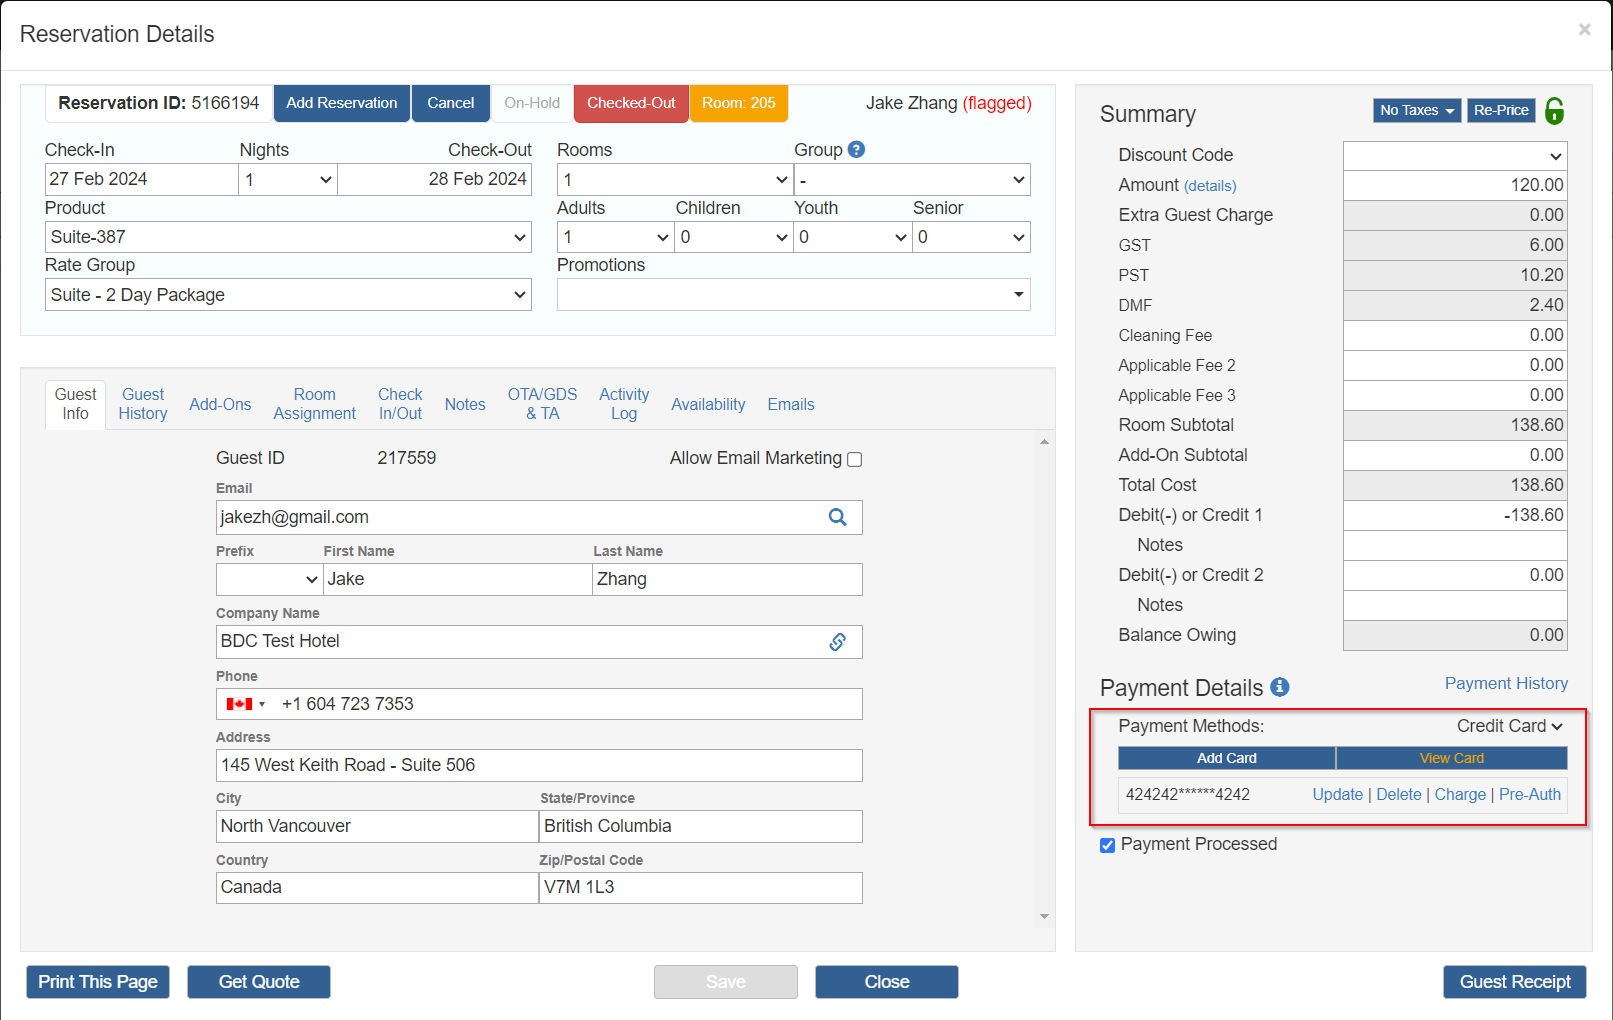
To view the card details, click on the View Card button. Then you need to
go through the reCAPTCHA validation process powered by Google to prove that "I am not a robot". Then click
the Reveal Credit Card Number button in the popup to reveal the card details.
Note:
- For each credit card, you only have up to 2 chances to reveal the card details.
- If you still need to reveal it after you have exhausted both chances, please contact
OnRes Support
- Re-entering or updating the card allows you to have another 2 chances to reveal the card
- The card data will be deleted 5 days after the reservation check out date.
4.4 What is Auto Re-pricing and How to Disable it?
Auto Re-pricing is a feature that automatically calculate the cost when you make any changes in the
Reservation Details window, e.g. changing dates, number of rooms, product, rate group, etc.
It is an efficient tool that allows you to instantly see the price change when you make
these changes without any extra clicks.
However sometimes you may also want to lock the price while you make these changes.
For example, when you want to make a free upgrade for your VIP guest to another room type and
keep the price the same, then you can use this Price Lock to disable the Auto Re-pricing
feature temporarily.
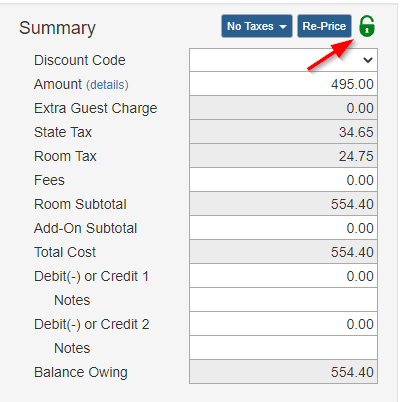 First, before you make any changes, click on the green lock to lock the price. Then
you can make the changes, which won't trigger any price re-calculation.
First, before you make any changes, click on the green lock to lock the price. Then
you can make the changes, which won't trigger any price re-calculation.
Remember to save your changes before you unlock it. Reload the reservation page will unlock
it automatically.
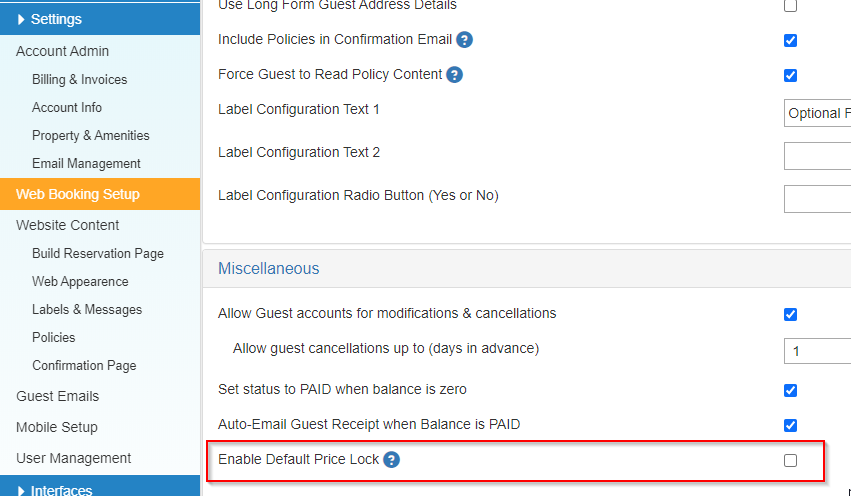
You can have this feature always disabled by default: Go to Settings >> Web Booking Setup,
toggle on the option "Enable Default Price Lock" under the Miscellaneous tab.
4.5 How to split a multi-room reservation?
When you booked a reservation that contains multiple rooms (with the same room type),
sometimes you may want to split them into multiple single-room reservations. For example,
when a guest booked 2 King Rooms under his or her name, one for him/her self, and the
other one for a friend. Then the guest wants to split the bill so he/she and the friend
can pay for their own room separately.
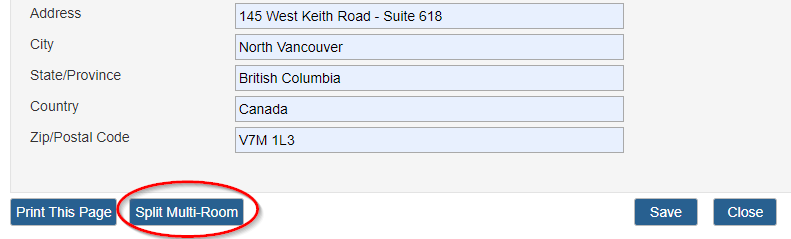
Then you can split the reservation into 2 single-room reservation for the guest, by clicking on
the Split Multi-Room button at the bottom to do that.
The system will produce a number of new reservations, each with single-room occupancy,
and split the room costs evenly.
Note 1: The system will split the number of guests evenly, but sometimes
the number of guests may not be accurate after the split. E.g. if the original reservation has
2 rooms for total 5 guests. After split the number of guests will be 2 on each room. So please
double check the number of guests in each reservation and make necessary corrections if needed.
Note 2: If there is Add-on items in the original reservation, the system will keep the
add-on items in the original reservation. Please examine the add-on costs and make necessary
adjustment.
4.6 How to Record Payment for money received outside OnRes?
Record Payment is for money that has already been collected outside OnRes — for example cash at the
desk, a cheque, an e-transfer, a debit payment, or a card that was processed on a separate terminal.
It does not charge a card, does not talk to a payment gateway, and does not post to the Financial System folio.
It is available on Reservation Details (and Master Reservation Details for multi-room stays) when the account
does not use the Financial System and is not connected to a payment gateway. Gateway accounts continue to
create Payment History automatically when they Charge a card. Financial System accounts continue to take
payments on the folio.
In Payment Details, press Record Payment and enter:
- Amount — defaults to the outstanding balance. You may enter a smaller amount for a partial payment.
Amounts of zero, negative, or greater than the balance are rejected.
- Payment Date — the date the money was actually received. Defaults to today.
- Payment Method — Credit Card, Debit Card, Cash, Cheque, E-Transfer, Gift Card, or Other.
This is the tender used outside OnRes. It is not Collected By.
- Card Type — shown only when Payment Method is Credit Card. Choose Visa, Mastercard, Amex, Discover,
Diners, or Other to describe the brand that was already processed outside OnRes. Web Booking accepted-card
settings may change the order or preselect a stored brand; they do not hide brands or block recording a
truthful supported brand. Record Payment never collects a card number, expiry date, CVV, or token.
Card Type is blank for cash, cheque, e-transfer, debit, gift card, and other tenders.
- Collected By — who collected or settled the money, not necessarily the Booking Source.
Supported values are Property, Booking.com, Expedia, Airbnb, any vendor-configured alternate
collector(s), and Other.
- Booking.com and Expedia may be OTA Collect or Hotel Collect. When OnRes has reliable virtual-card
evidence, Collected By is selected and locked (Booking.com or Expedia for OTA Collect; Property for
Hotel Collect). Point-of-sale names such as Travelocity do not change this.
- When that virtual-card evidence is missing, Property is only the default and may be changed.
- Airbnb is recorded as Airbnb.
- VRBO is Hotel Collect and records Property (shown as VRBO — Hotel Collect).
- Alternate collector option(s) (for example Stonewater's "CANADVAC") appear only for a property
that has entered its own text for them under Configuration > Web Booking Setup. It is entirely up
to each property: enter one name, or several separated by commas (e.g. "CANADVAC,BANANA") to offer
more than one at once, rename or remove any of them, or leave the field blank to hide the option(s)
entirely — there is no support-ticket step. A payment recorded with one of these options keeps the
exact text that was configured at the time, even if the property later renames or removes it.
- Other opens a required field for the actual collector name (for example a travel agent). It is stored
separately, not in Notes, and prints as Other — description.
Notes are not used to determine the collector. Record Payment still does not charge a card.
- Notes — optional. Do not enter card numbers. Notes are not used to decide Collected By.
Each recording adds a row to Payment History, including Payment Method, Card Type (credit card only), and
Collected By (Other prints as Other — description). You can record more than one payment. Debit/Credit totals and
Balance Owing update after each one. While a balance remains, the stay is partially paid and reservation-level
Payment Date stays blank. When the balance is cleared, the reservation is Paid and Payment Processed shows as processed.
Payment Processed is calculated from recorded payments. You cannot tick it to create history or mark a stay paid.
To correct a manually recorded payment, open Payment History and press Reverse. The original row is kept,
a reversal row is added, and the balance is recalculated. Reverse does not send a refund to a payment gateway.
If the balance becomes owing again, reservation-level Payment Date goes blank until the stay is fully paid again.
This capability is go-forward. Historical stays that never had a payment recorded in OnRes remain Unknown/blank
on reports. Do not use Record Payment to invent dates for past stays that were never recorded.